Thursday, October 17, 2013

Vegetarian Stuffed Peppers


So, yesterday, I didn't end up blogging .......

We went to our HOA meeting last night and it lasted a lot longer than I anticipated, and so, we ate out.

But today we made dinner using green peppers from our co-op, a new brown rice we are trying out, which our co-op coordinator shared with me, and eggs from a local farmer that we get through a friend. 

You can't make anything bad when you start with good ingredients like those! 

Today will be mostly pictures because stuffed peppers are pretty common but we did change up a few things


Florida grown, organic, brown rice, one of the better ones I have tried!


Washing  Peppers


Removing the seeds and core


Prepped and in the pan

Cutting up the tops to add into the filling


Saute for about 5 minutes  with grey salt

Add in chopped onions

Saute 

Because 2 out of 5 members of our family to do not eat beef at all we used TVP or as we call it veggie meat

The mix

I added in about 1/2 a cup of tomato sauce, 1 tsp of cumin, 1/2 tsp curry, salt, pepper, and garlic powder to taste

Mix the veggie meat filling and about 1 cup of pre-cooked rice

I seasoned the tomato sauce with a touch of salt, pepper, cumin, and garlic powder

Ready to go in the oven ( cover with foil first) 375 degrees

45 minutes later uncover and top with mozzarella. Allow to cook uncovered 5-10 more minutes 

Top with a fried egg! Indulgent yes, but yummy!!!!!!


Tuesday, October 15, 2013

Cauliflower Crust Pizza with Pesto and Veggies


So, Today we made dinner using two things from our basket; the cauliflower and the mushrooms. 

You will notice that many of the ingredients I am using today are similar to yesterdays ingredients. When I plan out our meals every Thursday after our co-op pick up ,I try to plan around what we get and also plan what I have to purchase from the store that can be used in more than one way.

So today we have 

Cauliflower crust pizza with a spinach and cashew pesto and  veggies.

I also made another cauliflower crust pizza that had pizza sauce and mozzarella . 

I have tried several cauliflower crusts and this one is  by far the "Best Cauliflower Pizza Recipe" I have had. You can find the recipe to the one I used with the steps here
at " Tasty Kitchen" 


Here a few pictures I took today though of the process.

The recipe calls for dried herbs but I have fresh so that is what I used ( it was still great- maybe better) 


Other ingredients for the crust ( see recipe for details) 
What I really like about this crust is that it is a low carb, gluten free, and corn free option. That means our entire family with all of it's allergies and dietary needs can eat this. That's a win in my book.


Cauliflower in the "Ninja" to turn into cauliflower "snow"


This next step( ringing out the cauliflower) is really important so do a good job!


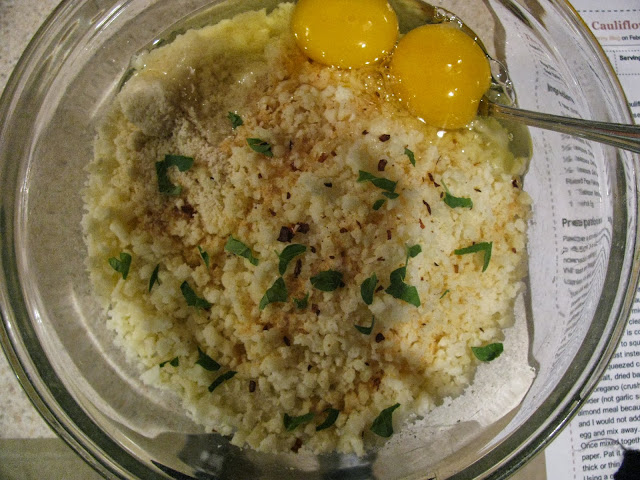
The cauliflower and other ingredients to be mixed


I formed our dough into two rectangles but one large circle would work nicely also


The crust gets pre-baked. This is what it looks like after 10 minutes


So now, onto the pesto to spread on your crust 

This is not the typical version of a pesto but my own

You will need 

1 package of baby spinach
1/2 cup of toasted cashews
1/4 cup of olive oil ( or more if you like) 
3 oz. Parmesan cheese
the juice of one lemon ( or more if you like- I do ) 
1/2 tsp of garlic powder
1/4 tsp of pepper
and salt to taste


I place everything in my "Ninja" and pulse ( traditionally you would use a mortar and pestle)


This is what you get. You should have some texture left. If it is completely smooth you have gone too far.
I also happen to use this over pasta as a sauce and it is delicious that way too. 


Then I saute veggies. In our house it's onions, peppers, mushrooms( from the co-op), and water chestnuts    (they add a nice crunch) 


Everything gets sauteed in a pan with some olive oil, salt and pepper


Once that is done you are ready to assemble.


When it comes out of the oven


YUMMY!


We are really loving our co-op goodies! I hope you all are also!

See you tomorrow! 

Monday, October 14, 2013

Tatsoi and Farro Salad with Roasted Chicken Breast


So , I will start by making this disclaimer.....

By no means am I a food blogger or expert on food, but I think I am a decent home cook. 

With that in mind, I decided that this week ,I would blog about what we are are making each evening with our co- op basket goodies. I think it is helpful to see what others are doing . I also know that I am a very forgetful person so blogging will give me a reference in the future for when I am trying to remember what it is I did with Tatsoi. 

You should know that I like really simple food and that  there are no exacts or measurements because that is not how I cook

So here we go........

 Tatsoi and Farro Salad with Roasted Chicken Breast
  

Preheat your oven to 375

I started by roasting off 2 bone in skin on chicken breasts. All I did was place them on a sheet pan, rub them with extra virgin olive oil, sprinkle them with Celtic grey salt, rosemary, thyme, and pepper.

Place that in the oven and roast approximately 40 minutes.


In the mean time while you are roasting your chicken you can start prep on your salad

You will need  Farro, Tatsoi, Cashews, Garlic, Parmesan Cheese, Lemon, Olive Oil, and Red Pepper Flake ( Salt and Pepper) 


I started by soaking my tatsoi in cold lemon water. It can just sit there until you are ready for it. 


 Next, cook your Farro according to package directions. That basically means bring salted water to a boil, adding the directed amount of farro, covering with a lid and allowing it to simmer for 15-20 minutes. When it is done, drain it and set it to the side.

( Sorry no Picture) 


Now, wait for your chicken to be done.

When your chicken comes out you should have something like this- Yummy!


You should set that aside under some tin foil so it can rest and the juices redistribute. 
Now you can get the rest of your salad together. 

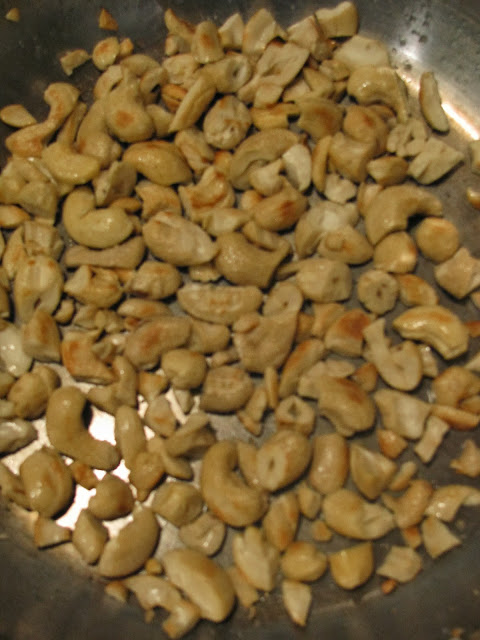
Chop up and toast the cashews in a pan over medium heat just until they are golden. Don't go any where, it happens fast. Continue to shake/ toss the pan so that you get a nice toasting on all sides or you can buy pre-roasted and salted nuts and just chop them up


While you are waiting for the cashews to toast you can smash some garlic . In our house we love the stuff so 6 cloves is about right, but adjust to your family.

Once the cashews are toasted set them aside on a plate and re-use the same pan to saute your garlic and a few shakes of red pepper flake in about 4 TBSP olive oil. I know that sounds like a lot but this is the dressing for your salad. Just cook until the garlic is fragrant and golden.


O.k. Once your garlic is golden set it to the side. Time to get that tatsoi out of the water and if you have a salad spinner, spin it! Make sure you have a dry bowl and add your tatsoi, the juice of 2 lemons, the garlic oil mixture ( still warm), 1/2 cup of grated Parmesan cheese, and the cashews. Then stir and taste. Adjust salt and add pepper as desired. 


Now, take your farro, and make a nice bed for your tatsoi salad to go on top.  


Add your Salad and chicken and you are done! 


All in all the meal was a success. It really is great on it's own, just like this, but if I had to change anything, I think I would have added a few golden raisins to the salad. I had a few regular ones on hand and tossed them into mine and so did my daughter, and we both agreed we liked it a lot that way also! This meal fed a family of 5 and we had some left over. This actually makes me really happy because now, I have lunch already made for tomorrow  for my self . 

I should note that EVEN my husband liked it a lot and that's like saying that slogan from the 80's " Hey, Mikey, he likes it." in this house!

Hope you enjoyed! 
 I'll be back tomorrow, with more co-op basket meals. See you then!     

Thursday, October 10, 2013

Danaus Gillipus -Queen Butterfly


The screaming began around 12:00 this afternoon in the middle of our Botany lesson. 

It had begun to eclose......

That is the fancy name for emerge. My friend "Madame Butterfly" as I so lovingly call her (being that she is the butterfly expert) educated me on this.

It was actually because of "Madame Butterfly" that this whole event even took place. You see she took pity on me when she found out that I had managed to kill 2 house plants and loose a caterpillar all in an attempt to be more like her. I wanted a real live butterfly, flying around my house too, well at least for a little bit...then I would let it go. 

So 9 days ago in the middle of the night she (being the amazing friend that she is ) left a gift on my doorstep. A real live Queen Caterpillar!
And it was potty trained........


By the next morning it was already hanging in the "J" form 


That same morning, half an hour later..............


A chrysalis!!! If you have noticed the little black thing on the bottom of the container that looks like a spider, well that's his antennae, all balled up like a old shirt dropped on the floor. If you look closely at the chrysalis you will notice gold flecks. In real life they look like real gold!!! 


So then we waited............9 whole days


This morning when we woke up and checked on him, we noticed that he had changed- a lot! Yay! Can you feel the excitement? 


The chrysalis was black and gold! ( 9 a.m.)


Then, the screaming part, 12:00 noon, during botany ....MOM!!!!!! GET THE CAMERA!!!!!!!!


You may notice that the top of his abdomen is a bit swollen, he is actually pumping the fluid from his abdomen up into his wings!! I am not sure if you can see it in any of these pictures but his proboscis was curling in and out also.


Outside with the lid off the container ( about 1/2 hour after he first emerged)


We took the clothes pin he was holding onto and clipped it to a milkweed in our front yard


Two hours later


What an amazing experience!